The Event tool helps you organize and publish health and wellbeing activities quickly and efficiently. Set up events, define key details, and make them available to employees in just a few steps.
Please note:
As soon as you have published your event, you can view it in the event calendar and edit it with a click.
You can no longer edit an event that has already started or that has registrations.
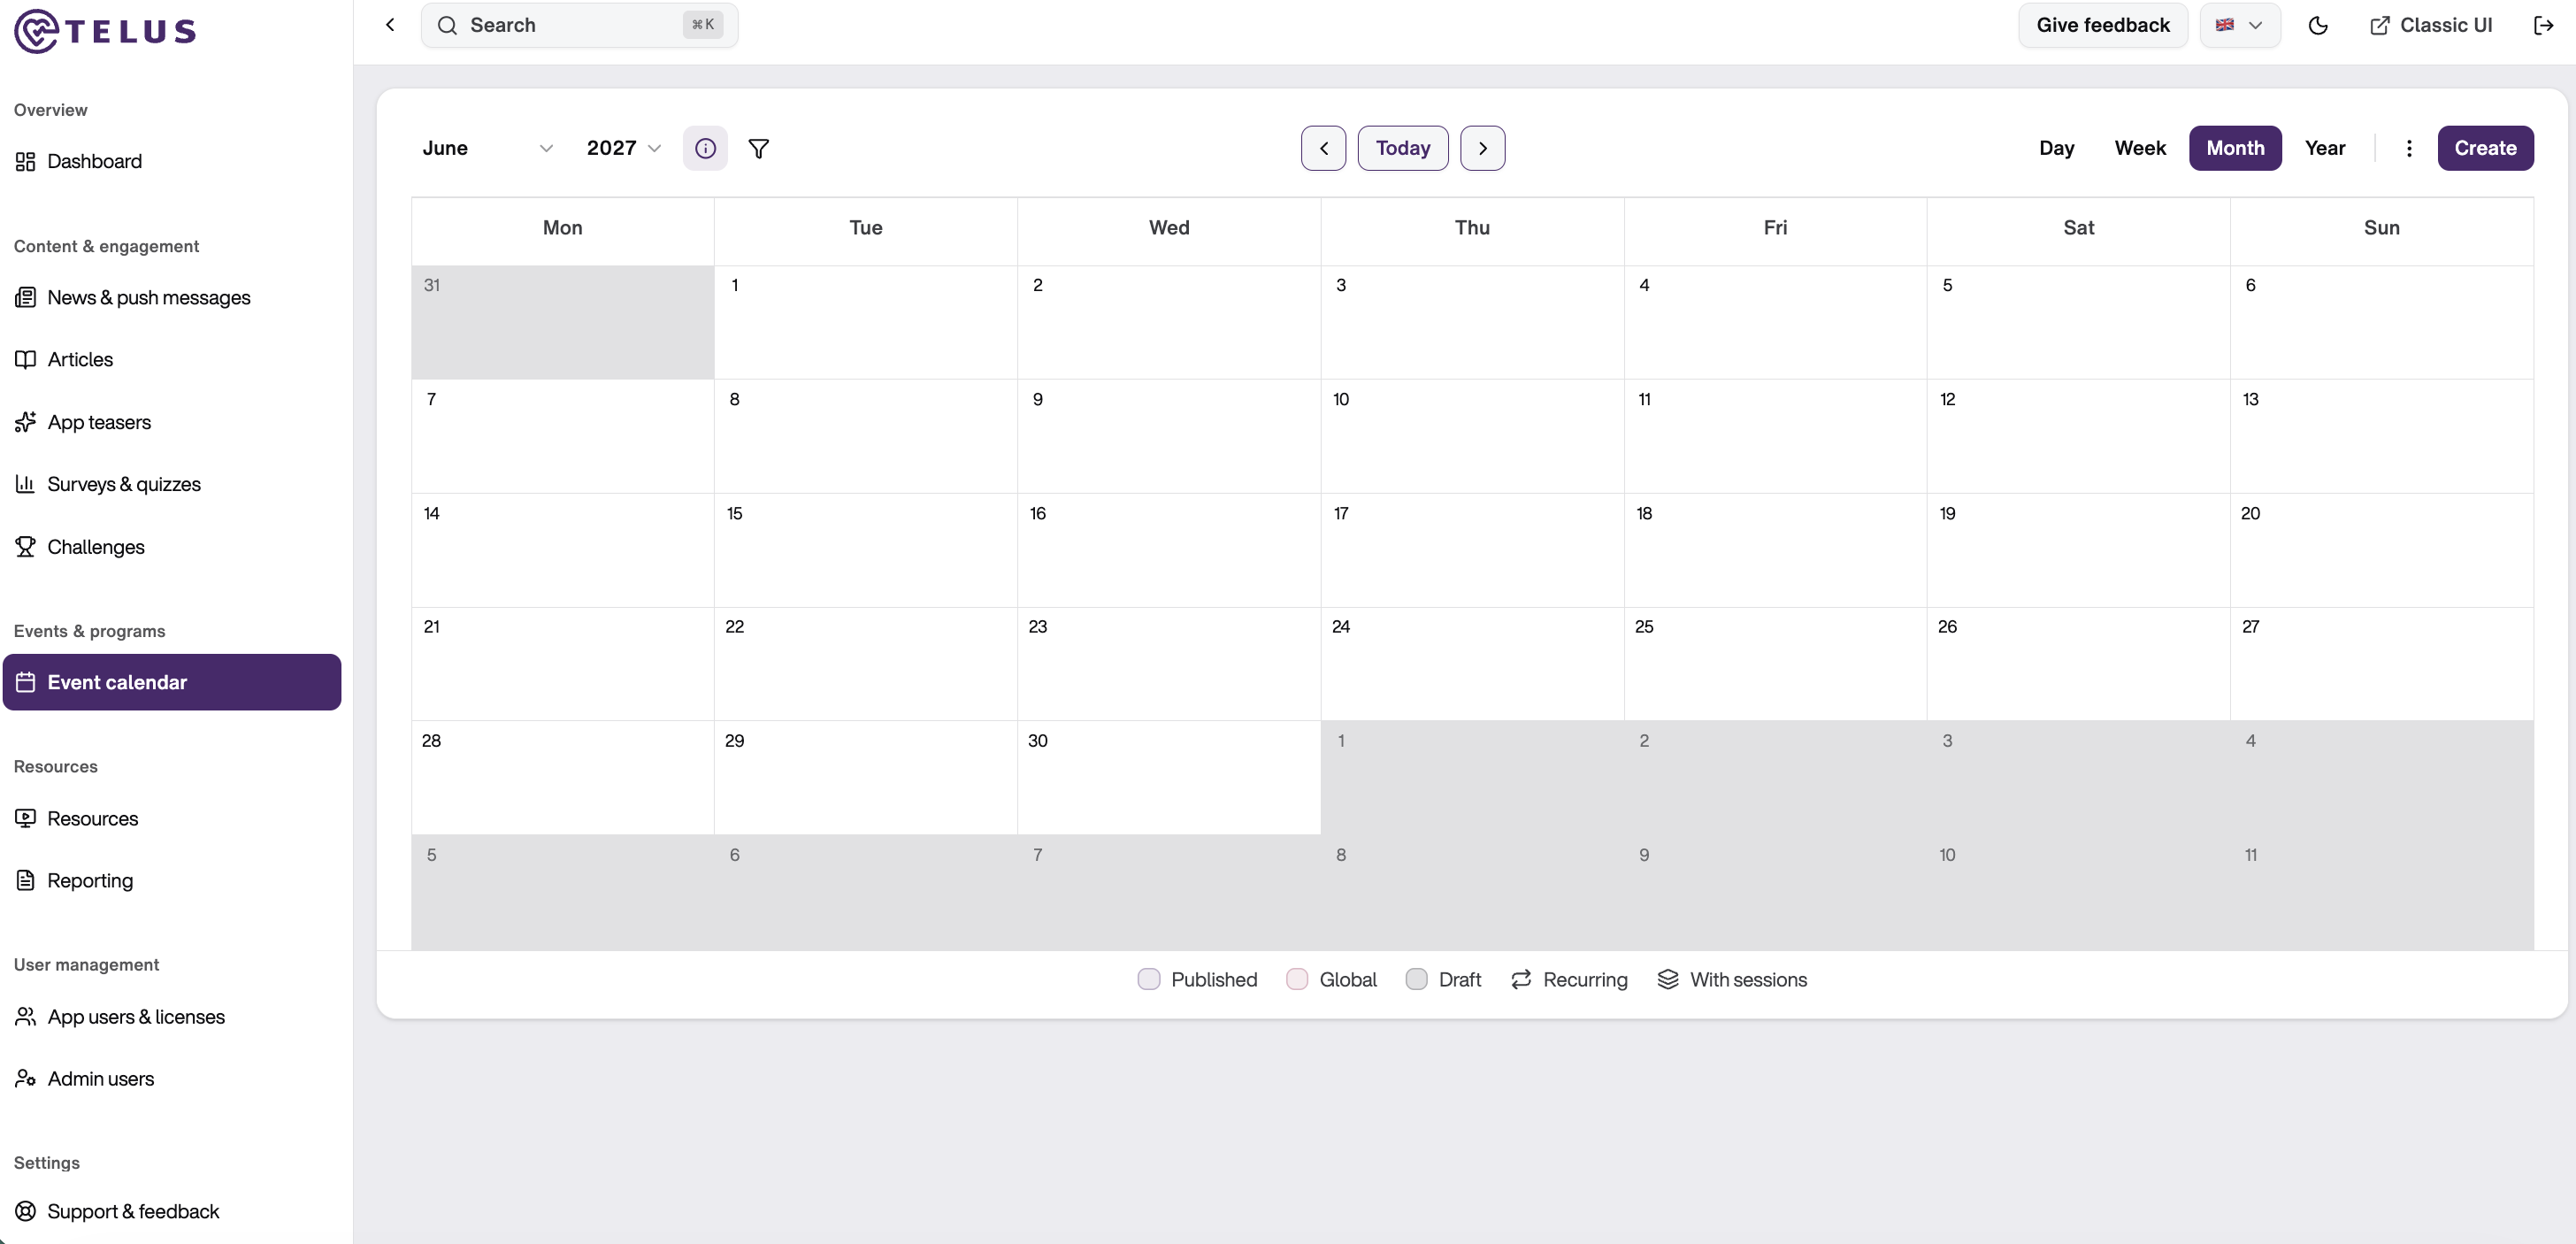
Simply click on "create" to set up a new Event.
a. Create a standard event
To create a standard event in the calendar choose "standard event". A standard event is for single or recurring events without time slots.
Step 1: General Information
In this step, enter the basic information about your event.
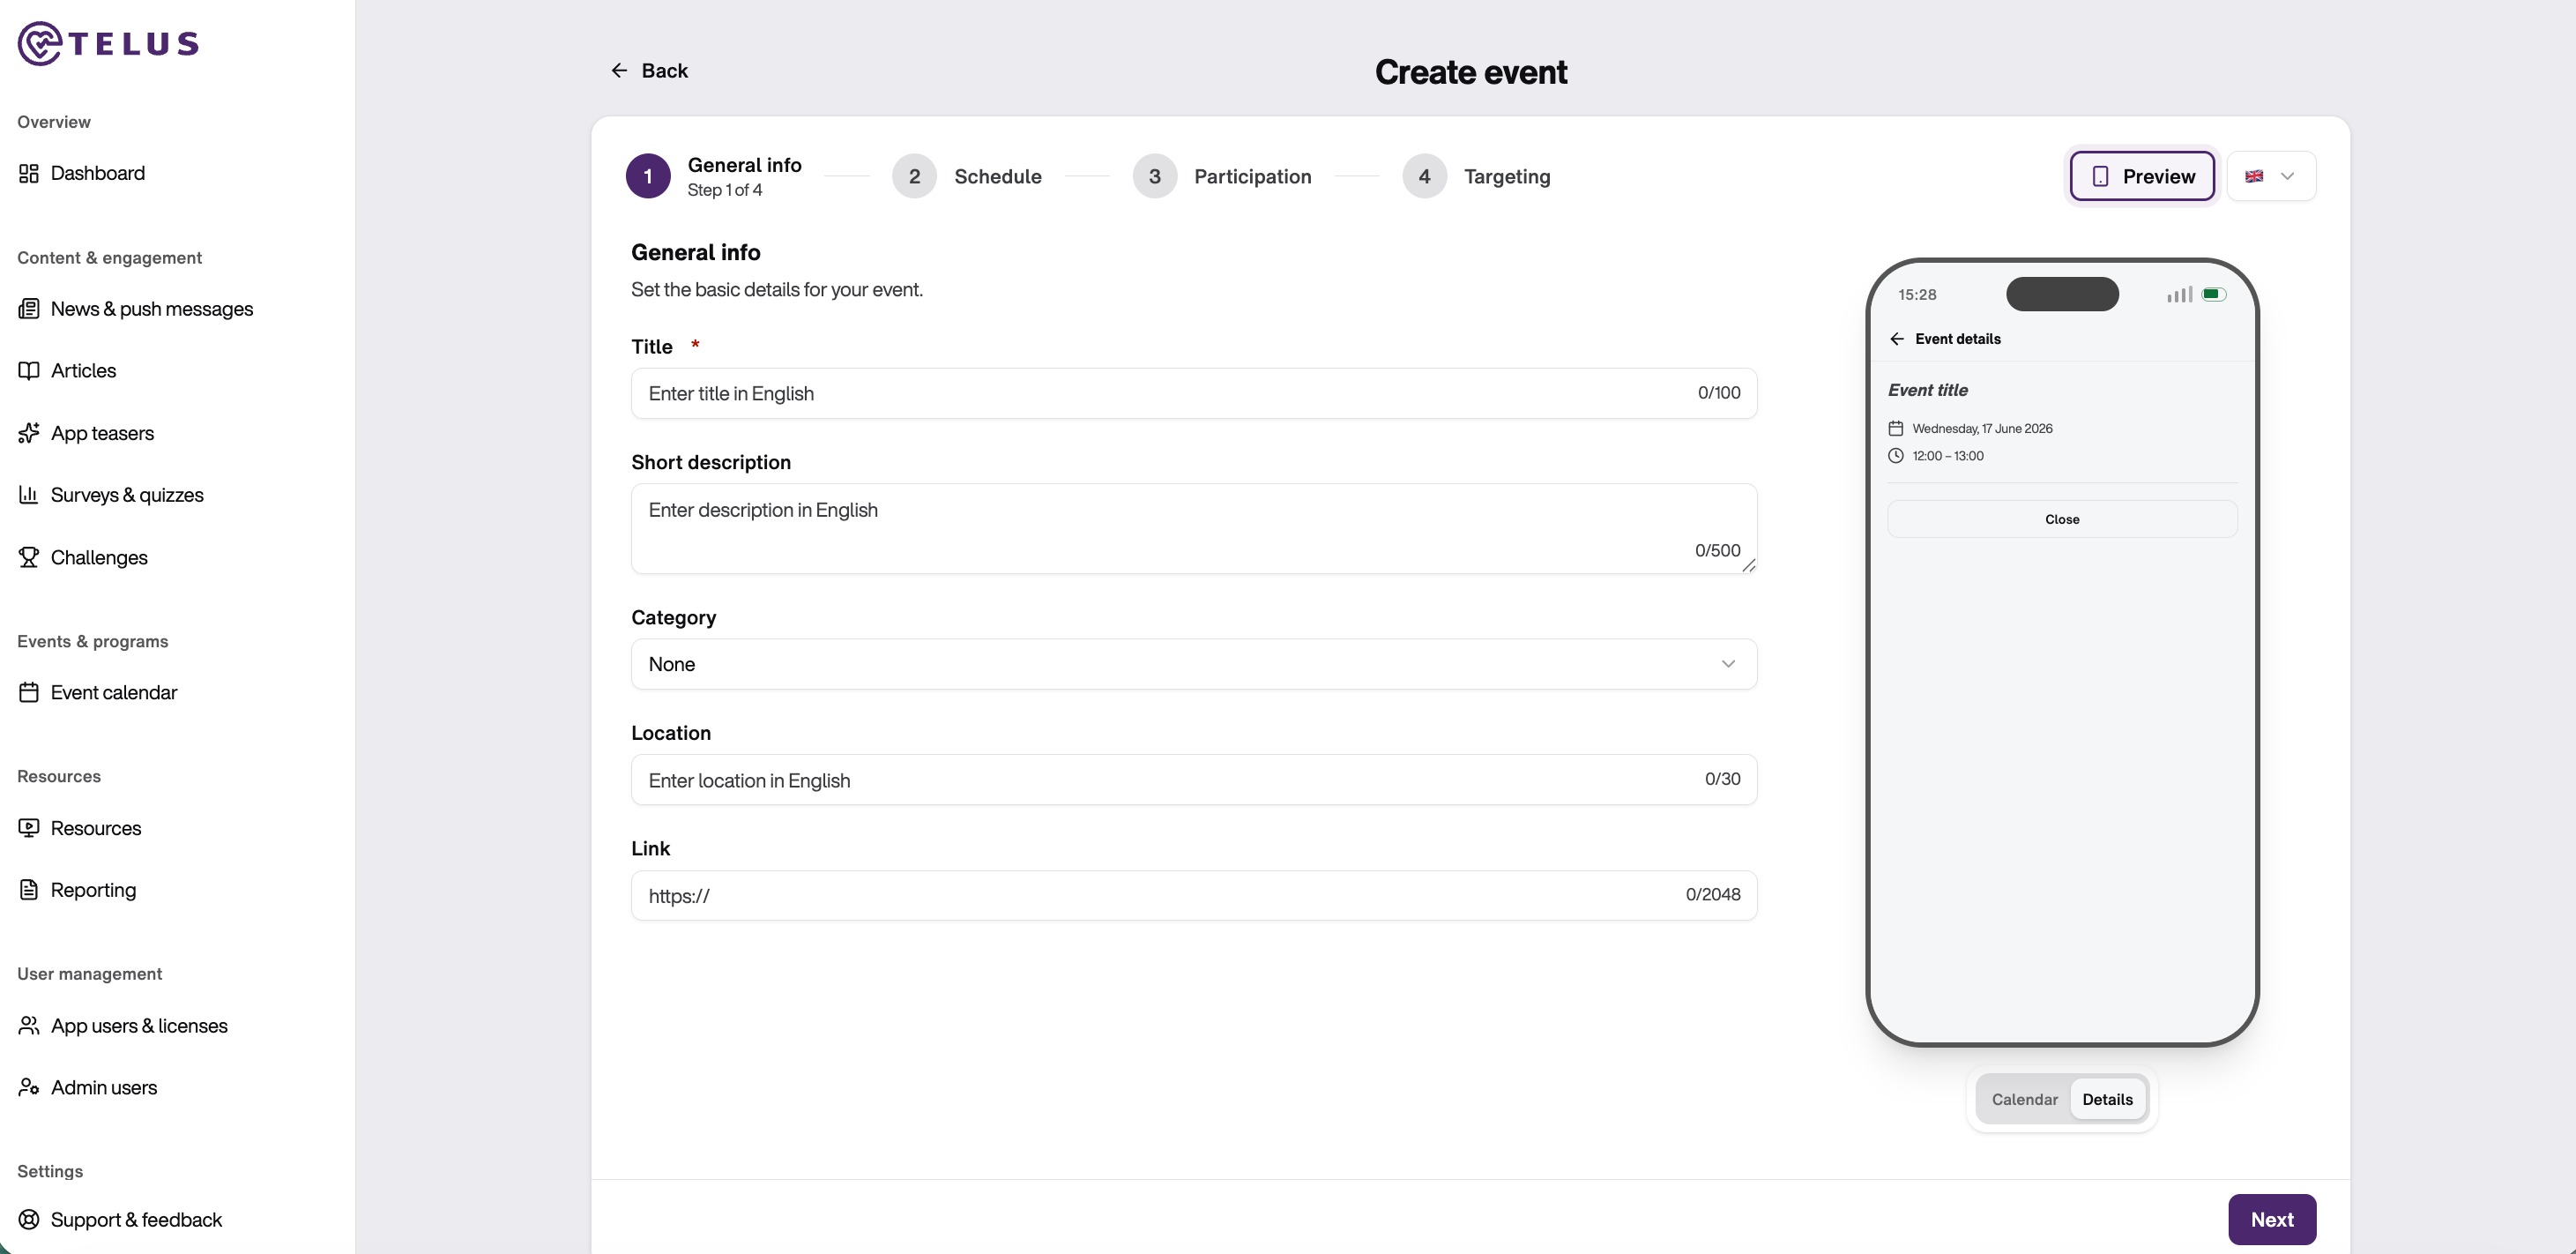
1. Enter the Event Title
- In the Title field, enter the name of your event.
- The title is mandatory and will be displayed in the event calendar in the TELUS Health Engage App
2. Add a Short Description
- In the Short Description field, provide a concise summary of the event.
- Include key information such as the purpose of the event, intended audience, or expected outcomes.
3. Select a Category
- Open the Category dropdown menu.
- Choose the category that best matches your event. Categories help employees identify relevant events more easily.
4. Specify the Location
- Enter the event location in the Location field.
- For in-person events, provide the venue name, building, or address. For virtual events, you may enter "Online" or the platform name.
5. Add a Link (Optional)
- Enter a valid URL in the Link field.
- This can be used for:
- Registration pages
- Virtual meeting links
- External resources
6. Review the Live Preview
- The mobile device preview on the right side of the screen displays how the event will appear to employees.
- As you complete the fields, review the preview to ensure the information is displayed correctly.
Step 2: Schedule
In this step, define when your event will take place and whether it will occur once or repeat on a regular basis.
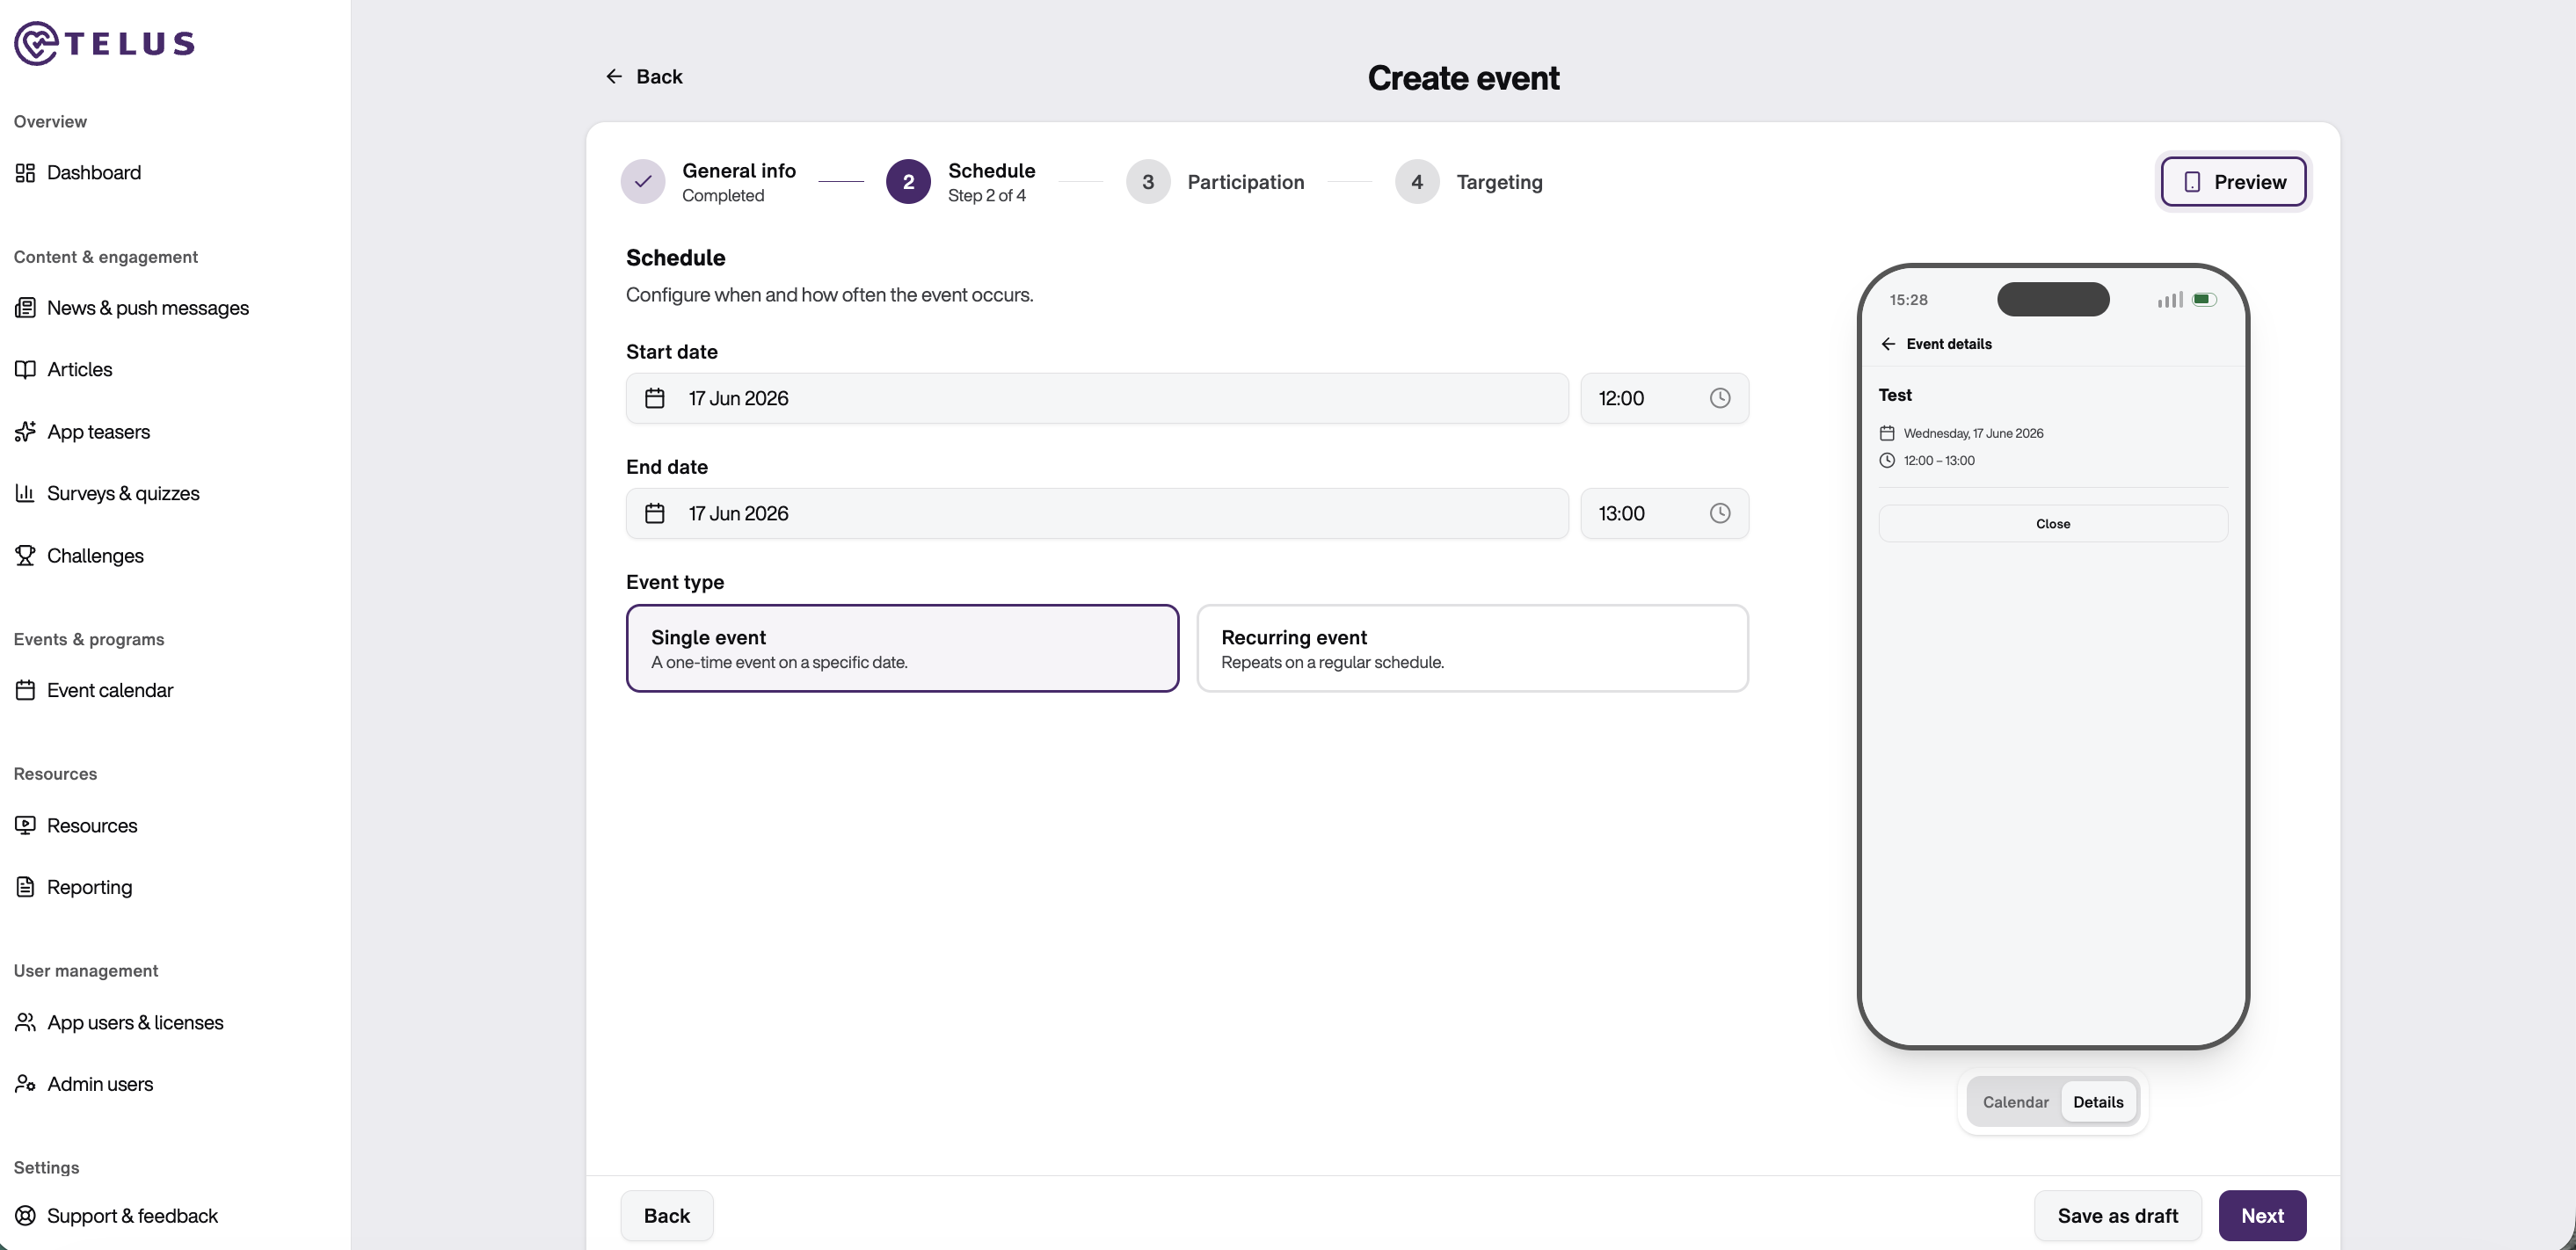
1. Set the Start Date and Time
- Select the a start date and time
- The start date and time determine when the event becomes active in the calendar.
2. Set the End Date and Time
3. Select the Event Type
Choose how the event should be scheduled:
Single Event
- Select Single event if the activity occurs only once. This option is ideal for example for workshops, webinars or health screenings.
- The event will be displayed only on the specified date and time.
Recurring Event
- Select Recurring event if the activity takes place on a regular schedule. This option is suitable for ongoing activities such as weekly fitness classes, monthly wellbeing sessions, or recurring training programs.
- You can then choose if the event takes place weekly or monthly, and how many times the event repeats.
5. Save Your Progress (Optional)
- Click Save as draft to save your work and continue editing later.
- Draft events are not visible to employees until they are published.
Step 3: Participation
In this step, configure how employees can participate in the event and whether additional actions, such as registration or surveys, are required.
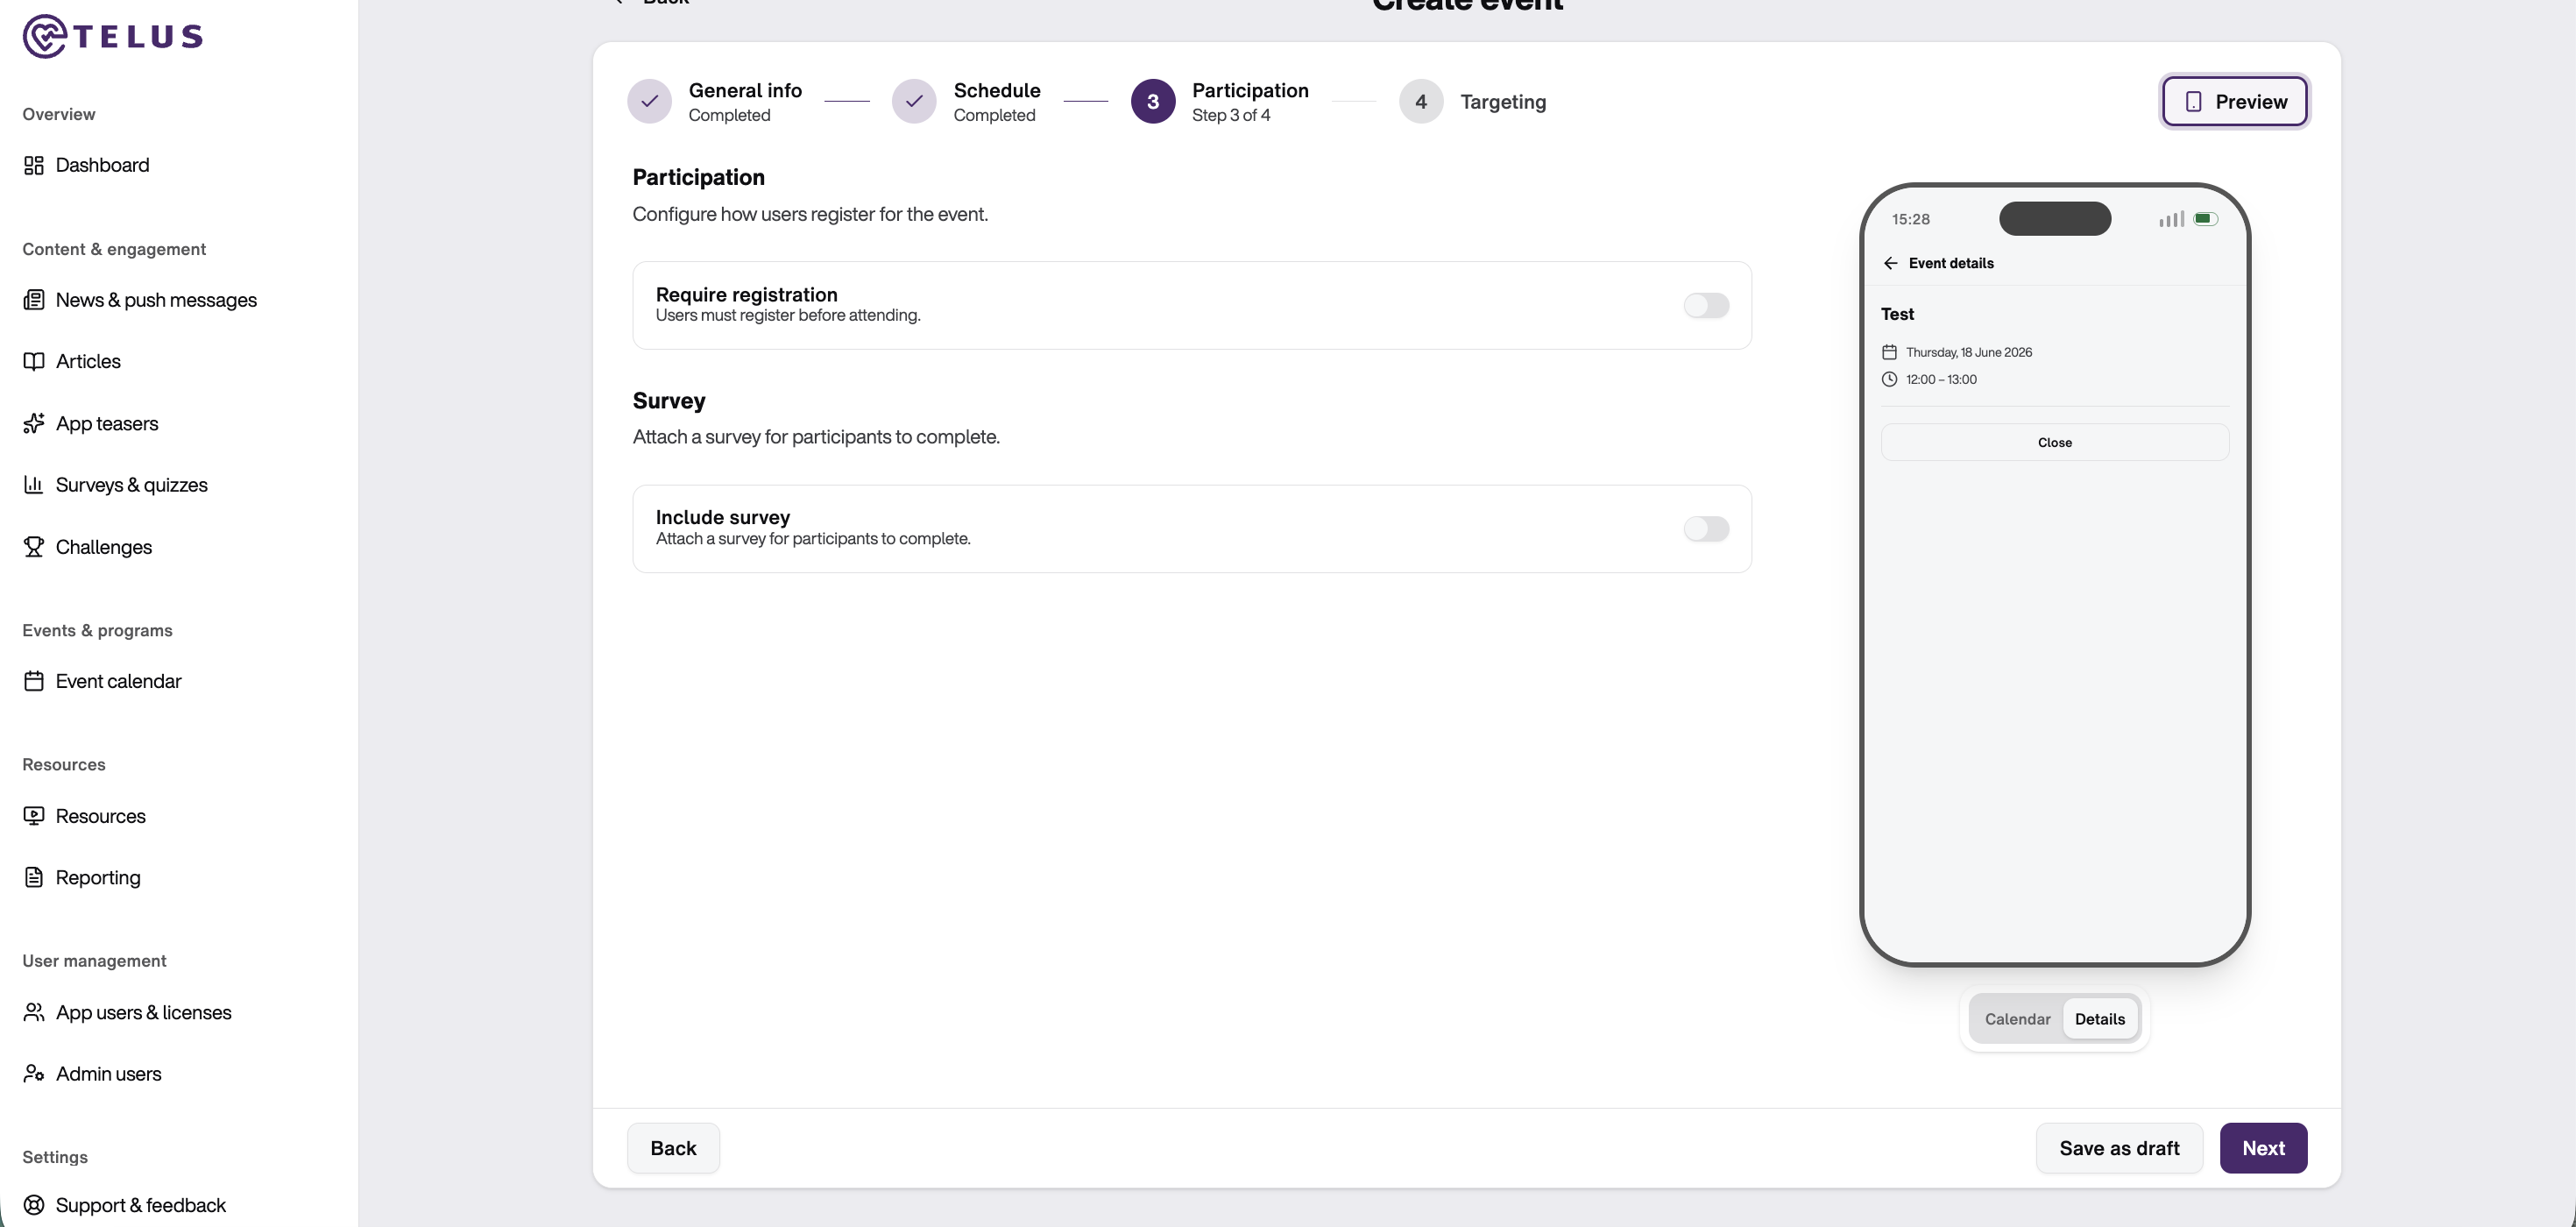
1. Configure Event Registration
The Require registration option determines whether employees must register before attending the event.
Enable Registration
- This option is recommended for events with limited capacity or where attendance tracking is required.
Disable Registration
- This option is suitable for informational events or activities that do not require attendance management.
2. Attach a Survey (Optional)
The Include survey option allows you to associate a survey with the event.
Enable Survey
- Turn on the Include survey toggle.
- Select an existing survey from the available survey templates.
- Participants will be able to access and complete the survey in connection with the event.
- Surveys can be used to:
- Collect feedback after an event
- Evaluate event effectiveness
- Gather suggestions for future initiatives
Step 4: Targeting
In this step, define which employees can view and register for the event.
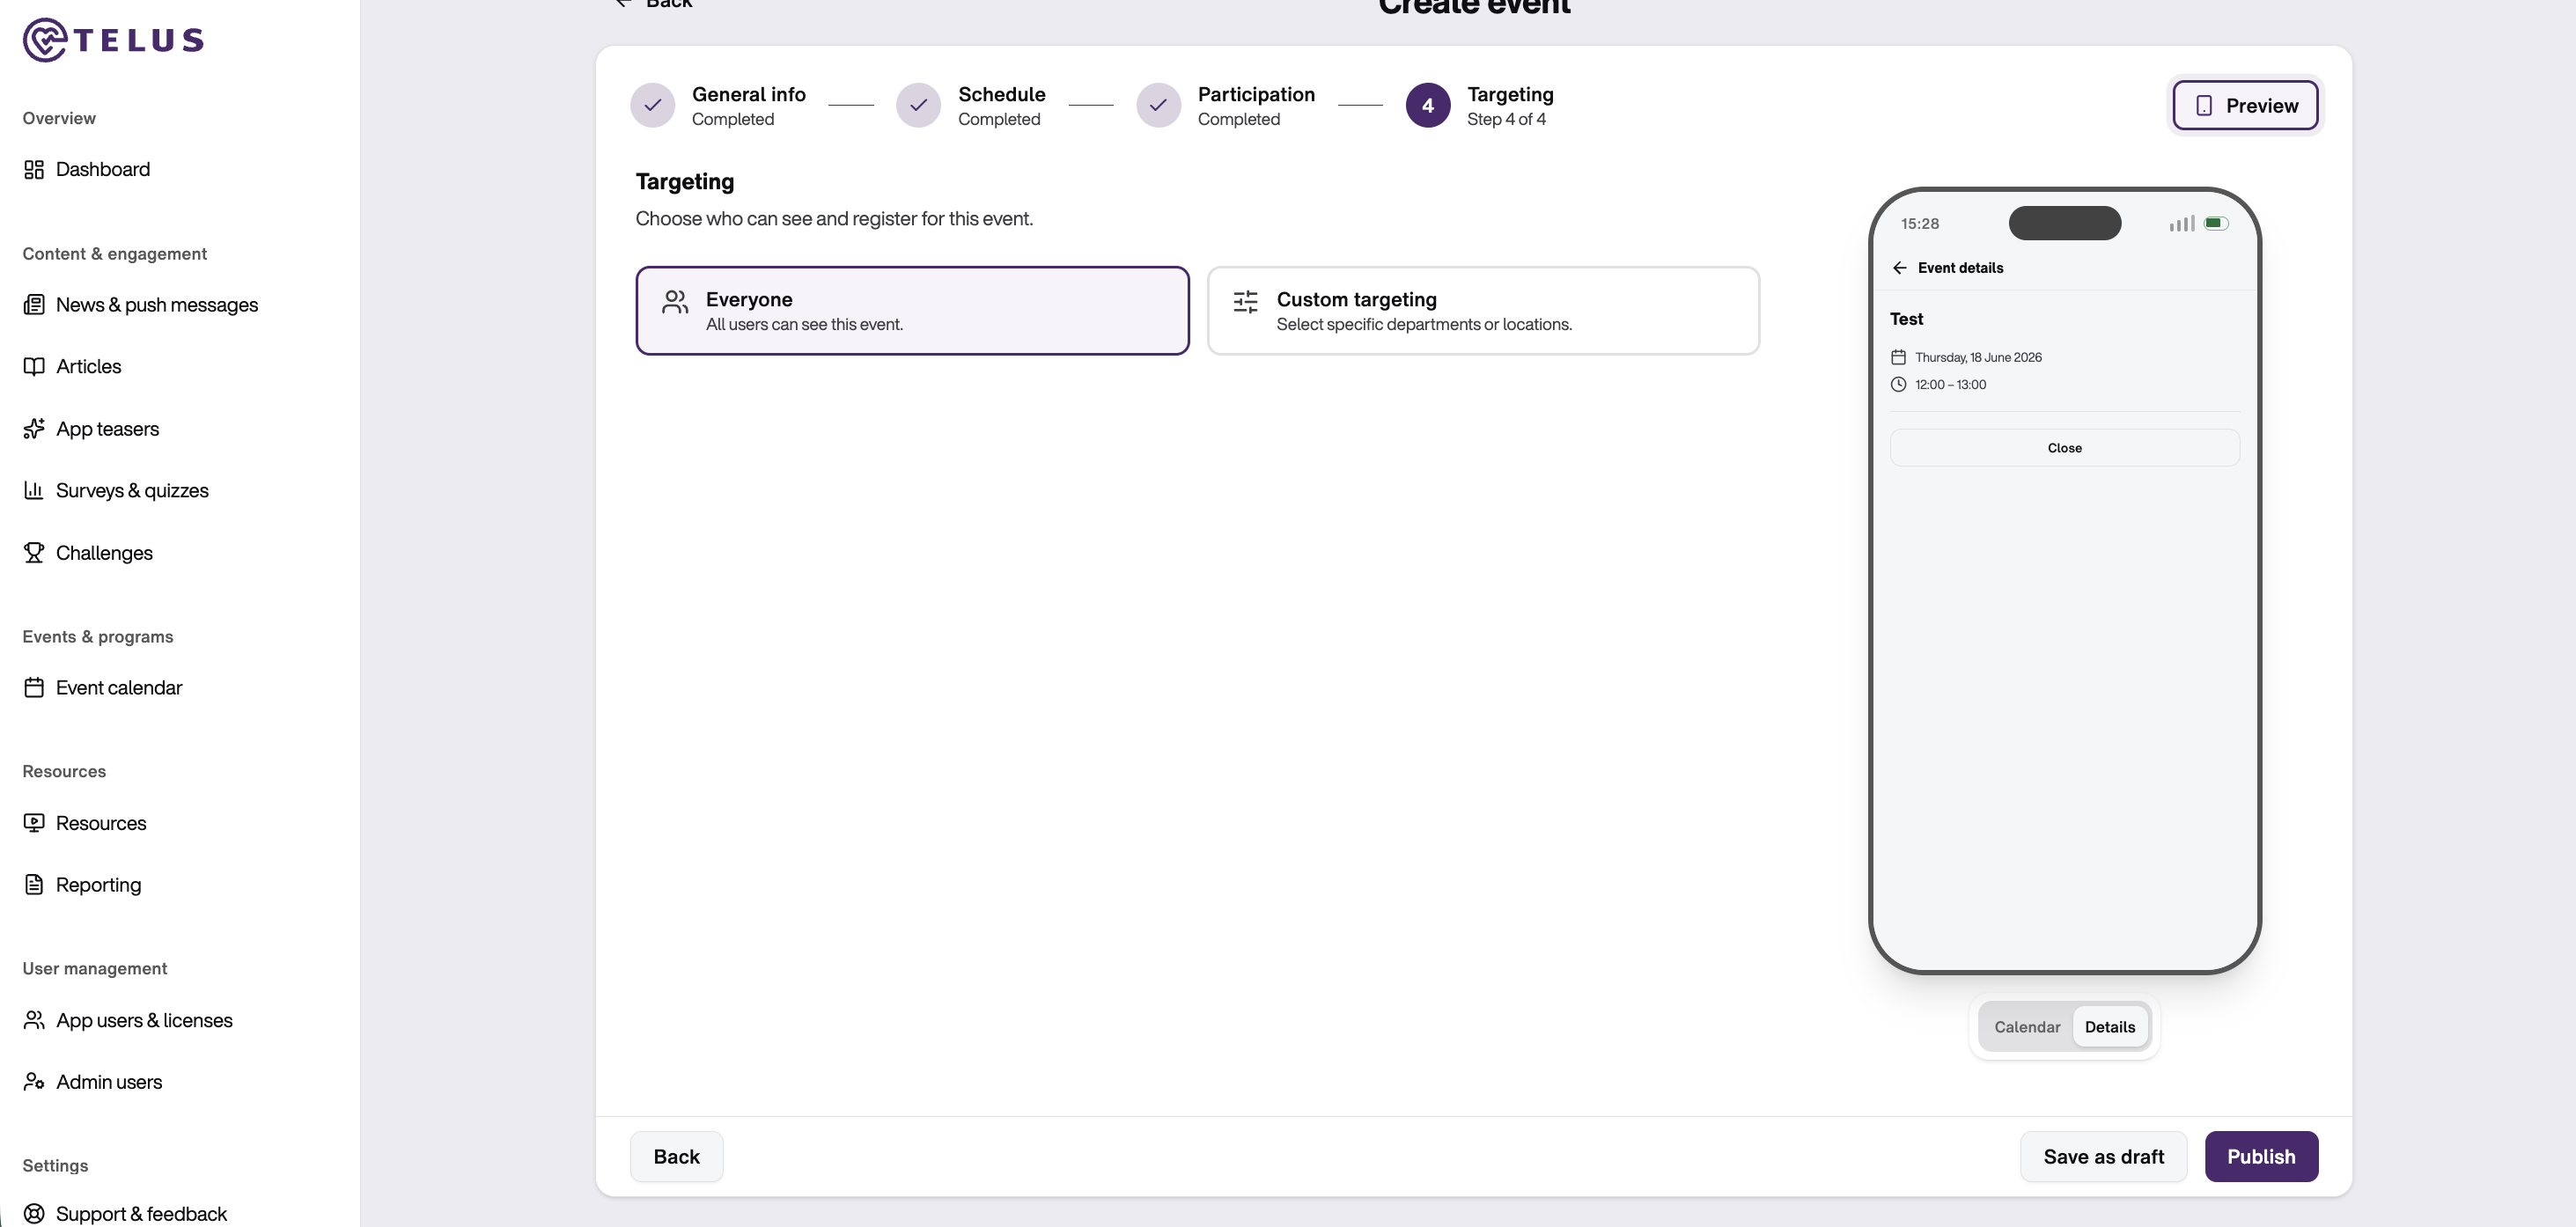
Everyone
- Select Everyone to make the event available to all employees.
- This option is recommended for company-wide events and general wellbeing initiatives.
Custom Targeting
- Select Custom targeting to limit event visibility to specific employee groups.
- You can target users based on departments or locations
- Only employees who match the selected criteria will be able to see and access the event.
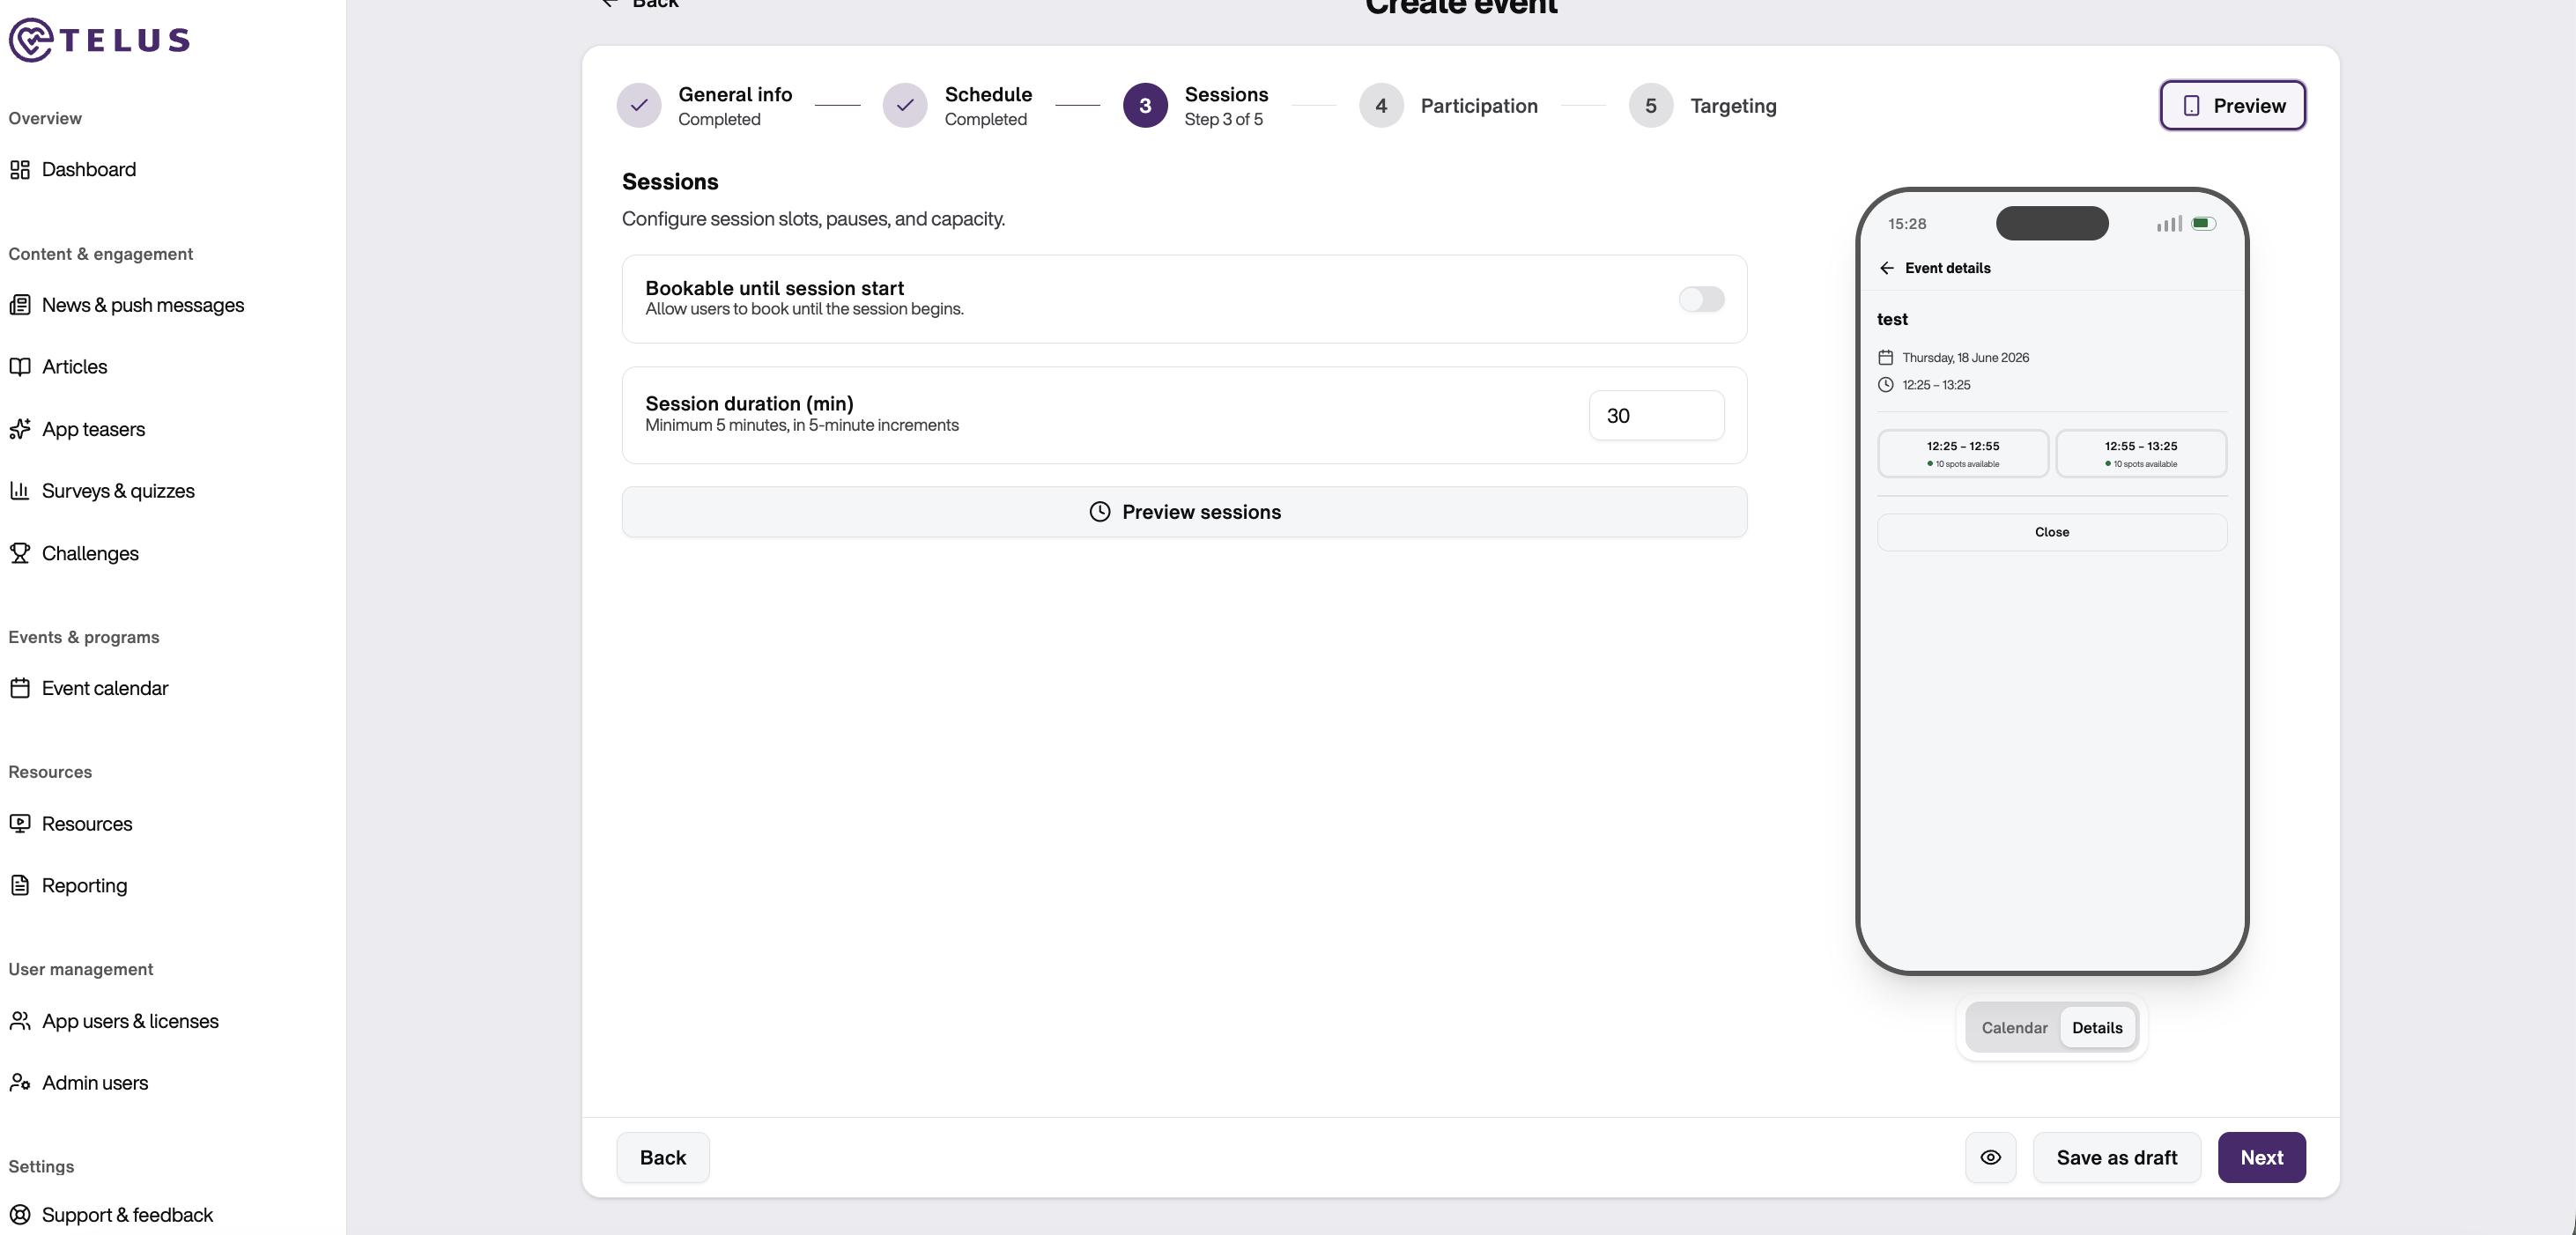
b. Create event with multiple sessions
An event with several sessions gives you the opportunity to offer your employees appointments for booking.
To create a session-based event in the calendar, click on “create” in the top right corner and choose "session-based event". A session-based event is for events with time slots or limited capacity.
Follow all the steps listed above and also:
1. Choose if the users are allowed to book until the session begins.
2. Specify how long a session should last
Was this article helpful?
That’s Great!
Thank you for your feedback
Sorry! We couldn't be helpful
Thank you for your feedback
Feedback sent
We appreciate your effort and will try to fix the article